A Quick and Easy Way to Make a Duo-Tone Effect in Photoshop

Adding a duo-tone effect to images and designs can help to make them on-brand and stand out from the crowd. So, instead of using plain stock photography, take a few minutes to add a versatile duo-tone effect to your images.
This simple technique allows you to create an interesting effect that resonates with your audience, and maintains the overall look and feel of your brand.
Here’s how to create a duo-tone effect easily in Adobe Photoshop…
Step One
Drop your image into Photoshop – This was sourced from Pexels.

Step Two
Select the Gradient Map adjustment. You can find this on the right-hand side, in the Adjustments tab. Or, you can also select this option by using the menu options at the top of the Photoshop window: Layer > New Adjustment Layer > Gradient Map

Step Three
Using the panel on the right-hand side, you can then select between a pre-made gradient, or create your own using the colour picker.
Pro Tip: Creating your gradient will ensure you can get a duo-tone effect that’s on-brand!

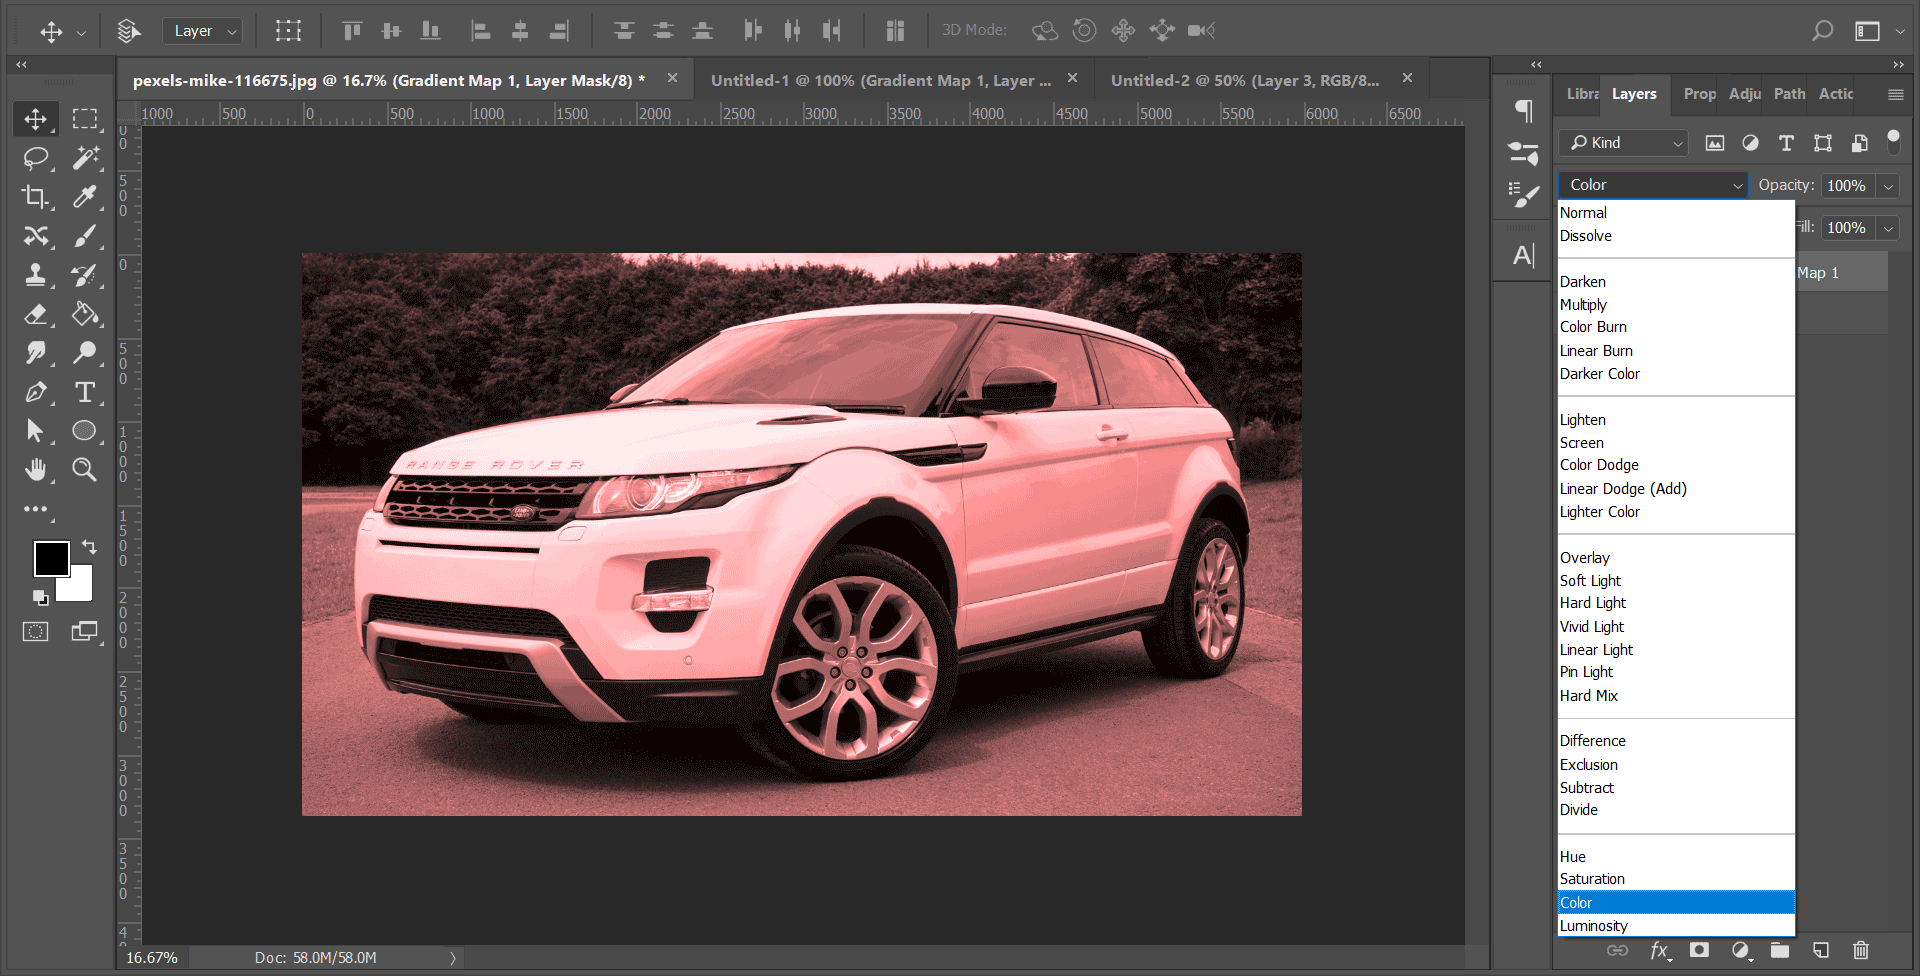
Step Four
At this point, you’re done! But, you can also play around with the Blending Modes (found at the top of the right-hand section) to make the effect a bit more interesting!
And you’re done! It’s really as easy as that!


![Affirmations for Graphic Designers to Help You Keep Going [INFOGRAPHIC]](https://images.squarespace-cdn.com/content/v1/5cfebab7bfcecb000194cc60/1711646088600-495MRCVU0Y8Y9GS07B7A/05+-+Cover+-+Affirmations+for+Graphic+Designers+to+Help+You+Keep+Going.png)
![Colour Psychology: What Colours Mean Around the World [INFOGRAPHIC]](https://images.squarespace-cdn.com/content/v1/5cfebab7bfcecb000194cc60/1711645558379-2W1EOZ0VHHFYZOL9OIV9/04+-+Cover+-+Colour+Psychology+-+What+Colours+Mean+Around+the+World+%5BINFOGRAPHIC%5D+.png)


